Tuesday, October 16, 2012

Gooey Pumpkin Cheesecake Bars

It's been a busy Fall at the Gibbons house with no signs of slowing down until maybe Thanksgiving!  And although I didn't get all of the 'Summer' recipes up that I wanted to post, I can at least make a better effort with some Fall Favorites :-)

These pumpkin cheesecake bars came from a recipe I got from a co-worker, who got them from her uncle, I think.  The first time I made them it was a 'blind' dessert--meaning the very first time I made them, I made them to serve them to others!  Which I wouldn't normally do, but I needed a Fall dessert for Bobby's 1st Annual Surgery Fall Fiesta.  For reference, the 'Fall' dessert was this, and the 'Fiesta' dessert was keylime pie.  They were a huge hit last year, and we made them again at the end of September for the 2nd Annual Surgery Fall Fiesta.  This year I served them with homemade whipped cream (on the side), but they are great on their own too.

And the best part is...you can make them ahead of time!  They might actually be better on Day 2, after they've chilled.  While I'm personally not a huge fan of pumpkin, my favorite part of these is the crumbly crust--delicious!


Gooey Pumpkin Cheesecake Bars

  • 1 (16oz) pkg pound cake mix
  • 3 eggs
  • 2 Tbs butter, softened
  • 4 tsp pumpkin pie spice
  • 8oz cream cheese, softened
  • 14oz can sweetened condensed milk
  • 16oz can pumpkin
Pre-heat the oven to 350.  In a large bowl combine the cake mix, 1 egg, butter, and 2 tsp pumpkin pie spice until crumbly.  I don't use my mixer for this, I usually combine it by hand with a large fork because I've noticed if I use a whisk, it gets all stuck in the middle.

Press the crust into the bottom of a PAMed 15x10 jelly roll pan, or I use a 9x13 cake pan.  

Using my mixer, in another bowl, I beat the cream cheese until it's fluffy.  Gradually beat in the sweetened condensed milk, then beat in the remaining 2 eggs, pumpkin, and remaining 2 tsp of pumpkin pie spice.  Mix well and pour evenly over the crust.

Bake 30-35 minutes, or until a toothpick (or similar tool) comes out clean when you test it.  Let it cool (I give it about an hour on a wire wrack), then chill covered in the fridge.  When cool, you can top with whipped cream or cool whip--or leave alone--and serve!

Anne's Whipped Cream  (no photo today, sorry!)

  • 1.5 cups whipping cream
  • 5 Tbs. powdered sugar
Using electric mixer, beat whipping cream until frothy.  Add sugar, while continuing to beat the cream. Continue until the cream has reached your desired level of 'firm'.  Takes just a few minutes, and fresh is always best!

Monday, September 3, 2012

Slow-Cooker Ropa Vieja (Cuban-style beef)

Happy Labor Day!

It's been a quiet summer in my kitchen because it's been a crazy summer around the rest of the Gibbons house.  Lots of travel for me + lots of work for Bobby = take out, airport dining, hospital food (which actually is pretty decent), and meals-for-one.  And my meals-for-one are pretty uncreative.  When Bobby's on call, and IF I'm home (big 'IF' these past few months) I shamefully admit to rotating dinners between Chipotle, Panera, and spaghetti or spaghetti squash with EVOO, garlic, tomatoes and parmesan or mozzarella.  Nothing too fancy!

*Side Note* I'm really into spaghetti squash these days.  If you're not sure how to make it, just take a sharp knife and poke some holes into it in a couple of places, put down 2 paper towels in the microwave, and do 5 minutes on high, flip it on the other side, and 5 more minutes on high.  I strongly recommend waiting a few minutes for it to cool before taking it out, or using an Ove Glove of some sort.  Then cut the squash down the middle, scoop out the seeds, and take a fork to the 'meat' of the squash.  Substitute as cooked pasta!  Brilliant!

But anyway--we're ready to settle into Fall around here--Bobby's been in the ICU all summer and moving to a General service tomorrow (yay!) and I have three travel-free weeks this month!  So I promise some good Fall recipes coming your way (and maybe some lingering summer ones that got delayed).  

Also, based on feedback received from a recent email blast/rant (Tales from the Middle Seat:  A Travel B!tch's Guide to Not Being An Idiot at 35,000 ft) that most people enjoyed--or pretended to--I'm contemplating a humor/opinion blog to share things like Middle Seat, and other similar [essays? short stories? notes? not sure].  I'm a little gun-shy to try the double-blog route again.  But sound off in the comments if you're in support and I'll think about it.  Who wouldn't love an extra dose of pointed and usually sarcastic Anne Wit? Or you can comment if you'd like to read Tales from the Middle Seat and I'll email it to you.

OR you can just read the recipe below :-) Which is why you clicked this link in the first place, right?!  OK so Ropa Vieja is my very favorite-favorite-favorite Cuban dish.  Love it.  So I was beside myself with glee when Real Simple emailed me this recipe for my slow cooker!  You know I love a good slow cooker recipe and this one is awesome.  And it makes a ton so you'll have lots of leftovers!


Slow-Cooker Ropa Vieja


  • 28oz can diced tomatoes (No Salt Added in this house)
  • 2 red bell peppers, sliced long-wise, 1/4-1/2in thick
  • 2/3 onion, sliced
  • 2 tsp dried oregano (I probably use more)
  • 1 tsp cumin (again...I probably use more)
  • 1-2 lbs flank steak, cut crosswise into thirds
  • 1-2 cups rice (I used Basmati because it's delicious)
  • 1 avocado to garnish
  • Handfull cilantro to garnish
In your slow cooker, combine the tomatoes, peppers, onion and spices.  Place the steak pieces into the slow cooker and kind of 'nestle' them in--maybe turn them over in the tomato mixture a little bit, or try to make sure they're partially covered by it.  Slow cook on high for 4-5 hours or low 7-8.  I always do low if I can--just makes the meat more tender.  

About 25-30 minutes before serving, make the rice, slice an avocado and prep your cilantro.  Then right before serving, use two forks to shred the meat and mix well with the tomato mixture.  I serve rice, then meat, then garnish.  So good!

Sunday, July 29, 2012

Lemon Pie

There were plenty of things I could have and should have been doing this weekend. There were plenty of things we planned on and talked about doing.  What did we actually do?  Sit in front of the couch and watch every minute of the Olympics on the DVR.  We are huge Olympics nerds.  We even watched all the cycling.  So I figure, while I am parked on the couch, I could at the very least post a new recipe in between swimming finals.  Here we go:


Make no mistake--this is the best lemon pie.  Ever.  I think Bobby's already had me make this 3 times this summer!  He says he prefers it, even to key lime pie, which--if you know Bobby--is fairly shocking.  But it really is delicious.  It's pretty simple, so I don't encourage cutting any corners, because it's not a complicated recipe--and I think hand squeezing the lemon juice, doing homemade whipped cream, and a homemade graham cracker crust...that's what makes the pie!


And I promise it isn't tough--because if it was tough, I wouldn't do it :-)


Anne's Best Lemon Pie Ever

  • 1 and 1/4 c graham cracker crumbs (I use the Reduced Fat Honey Maid--the only 'corner' I cut)
  • 2 and a 1/2 Tbs powdered sugar
  • 4 Tbs butter, melted
  • 6 egg yolks
  • 2 (14 oz) cans sweetened condensed milk
  • 1 cup fresh lemon juice (~5 lemons)
  • 1 cup whipping cream
  • 2 Tbs powdered sugar


Pre-heat oven to 350.


Use a food processor or blender to crumble the graham crackers into crumbs.  Inside the box of graham crackers they'll be divided into three little packets.  You'll use a whole packet and then 2-3 crackers from a second packet.  Processing them takes seconds, and it's easier to press into a crust if the crumbs are really fine.  In a medium sized bowl, mix the crumbs with the 2.5Tbs powdered sugar.  Add the melted butter until well blended, and then press the mixture into the bottom and the sides of a 9in pie plate. Try to press the crumbs into an even amount--something I'm still struggling with perfecting.  I usually pour them all in the middle and then work them up the sides of the pie plate, taking care not to make the edges too thick.


Bake the crust for 10 minutes, and then cool on a wire rack for 30 minutes.While baking and cooling the crust, whisk together the egg yolks, sweetened condensed milk, and lemon juice.  As mentioned, you cannot beat fresh squeezed lemon juice.  It takes a while to get a cup--one lemon makes about 1/4c juice, and I like to get a 5th lemon just to be safe and if I don't use it, I garnish with it.  Use a wire mesh strainer to get rid of lemon seeds and any pulp that accumulates.  


Pour pie filling into the crust after it's cooled, and bake  at 350 for 15 minutes. Afterwards, cool on a wire rack for an hour, before covering and placing in the fridge for  4 hours to chill.  Honestly if you can chill it closer to 8, that is significantly better. 


Right before serving, use an electric mixer (yay KitchenAid!) and the wire-whisk attachment to make the whipped cream.  Beat the whipping cream on high speed until foamy.  Gradually add the remaining 2Tbs powdered sugar.  Stop beating when the whipped cream has 'soft peaks'--but I like it a little more firm, so I beat mine until it's reasonably sold (as seen above).  Garnish--if desired--and serve!  Soooo yummy!


Friday, July 13, 2012

Mexicali Crab Cakes

Crab cakes are great any time of year--but they're especially great as a light summer dinner.  My original recipe for crab cakes is here, and it has kind of an Asian-flavor twist to it.  This recipe I found in my Cooking Light cookbook and was absolutely shocked I hadn't made them before!  And we absolutely loved them--I can't wait to make them again.

One of the best things about making crab cakes is that they sound really fancy, but really, they take hardly any time at all.  You mix all ingredients in a bowl, form cakes, and bake them--usually all in under a half hour.  As far as I can tell, there's only one secret to crab cakes--and that's high quality canned crab.  My mom always said to buy the most expensive cans of crab in the store.  I follow that advice every time and it never disappoints!  So while this dinner is quick, easy, tasty, and makes you look good--note that it's not the cheapest.  But quality crab is worth it :-)


Mexicali Crab Cakes


  • 1.5 Tbs margarine or butter
  • 1/4 c finely chopped celery
  • 1/4 c finely chopped red bell pepper
  • 1 finely chopped and seeded jalepeno
  • 1/4 c mayo (although we recently learned you can easily substitute fat free greek yogurt, plain, just as well and it's much healthier than mayo)
  • 1 tsp chopped fresh cilantro or parsley if preferred (but being totally honest I think I used dried and it was fine!)
  • 1 tsp Dijon mustard
  • 1/2 garlic salt or garlic powder
  • a few cranks of the pepper mill
  • 1 egg, lightly beaten
  • 3/4 cup Panko or other breadcrumbs
  • 1/4 chopped green onions
  • 1 lb (about 2-3 cans) lump crab meat
  • 1 can whole-kernal corn
OK I know that looks like a lot of ingredients, but don't let that deter you.

Pre-heat your oven to 450.  Melt the margarine/butter in a small skillet over med-high heat, and add celery, bell pepper, and jalepeno.  Saute for about 3 minutes or until tender.

In a medium to large mixing bowl, mix your mayo or yogurt with the cilantro, dijon, garlic salt, pepper and egg.  Add in the celery mixture, Panko, green onions, crab, and corn--stirring until well mixed.  Hand-form about 8-10 small cakes, or 6 large ones as shown above.  As an option, you could also dredge the cakes in crushed cornflakes if you wanted a crispy exterior.  Place on a baking sheet and bake for 15 minutes.  After 15 minutes, carefully flip the cakes, and bake an additional 6 minutes on the other side.

The recipe recommends serving with a cocktail sauce or salsa...I used sweet chili sauce because I'm obsessed with sweet chili sauce and think it should be on most things.  Serve with whatever works for you!

Thursday, July 5, 2012

Black Bean Burgers

OK, OK I'm a little late in the burger post, since most people probably did their burger-grilling yesterday.  But it's summer, which means you never really put the grill away--and these vegetarian burgers can actually be baked as well.  Just giving you all some options!


Bobby and I love all kinds of burgers--beef, bison, turkey, salmon, and our new favorite--black bean burgers.  Oddly enough, Bobby picked up this recipe at our gym--the little Orlando Health Wellness Center.  Every month they post a featured recipe--and Bobby brought this one home one day.  It's a little spicy--but a lot of the spice could easily be omitted too.


So if you didn't get your burger-fill over the July 4th holiday, give these a try soon!  


And on a side note--we had a laid back 4th (which I guess is just kind of what happens when it's mid-week).  Bobby was on call in the ICU overnight on the 3rd so he napped most of the day, and then later he grilled some chimichurri-marinated chicken tenders, and we paired that with chips and homemade guacamole, watermelon, and lemon bars.  Putting in a plug for some past blog oldies-but-goodies.


Black Bean Burgers

  • 1 16oz can of black beans, drained and rinsed
  • 1/2 green bell pepper, cut into 2in pieces
  • 1/2 onion, cut into wedges
  • 3 cloves of garlic, peeled
  • 1 egg
  • 1 Tbs chili powder
  • 1 Tbs cumin
  • 1 tsp Thai Chili Sauce or hot sauce
  • 1/2 cup bread crumbs (we use Panko)

If you're grilling outdoors, pre-heat your grill on high and lightly oil a sheet of heavy-duty aluminum foil.  If you're baking, pre-heat the oven to 375 and lightly PAM a baking sheet.


In a medium bowl, mash the black beans with a fork (or a potato masher, in my case) until they're thick and pasty.


Then, in a food processor (or blender if you don't have one--or you could hand-chop if you were really committed), process the bell pepper, onion and garlic.  Stir that mixture into the beans.


In a small bowl, stir together the egg, chili powder, cumin, and chili sauce--and then add to the bean mixture.  Mix in Panko or bread crumbs until the mixture is sticky and holds together pretty well.  Divide it into four patties.


If grilling, place patties on foil and grill about 8 minutes on each side.  If baking, place patties on the baking sheet and bake them for about 10 minutes on each side.


As you can see from the photo, we like to have these with whole wheat buns, fresh spinach leaves, a slice of tomato, and a tick topping of hummus (we prefer the Publix-brand roasted red pepper hummus for added flavor).  With the hummus, you really don't need to add any cheese.  If you do want cheese--I'd omit the hummus and add a slice of pepper jack.  Or you could do a regular hummus and some crumbled feta.  Just some ideas to keep it interesting!

Monday, June 25, 2012

Slow-Cooker Red Wine and Mushroom Risotto

Now, if you linked here from Facbeook, you'll notice I did not include a picture of this in the link.  And that's because this is not the most photogenic of dinners!  Believe me, after you've been smelling this cook for hours in the slow cooker, it will look delicious when it's ready.  But I am posting a photo on the page, just so you know if it turns out 'right'. 


I'm hoping this post will actually offer me a little inspiration.  Coming back from a busy weekend away, I'm feeling a little lethargic today (Tropical Storm Debby isn't helping with a total lack of motivation).  I feel like I want to cook something...but have no idea what!  Yes, even people who love to cook have these days.  So I thought a blog post might give me some ideas!


This recipe is from Not Your Mother's Slow Cooker cookbook, and it quickly became one of our favorites!  We eat it regularly as a main dish, I made it for a little holiday gathering with some Junior League pals and it had good reviews, and I made it as a side dish with my mother-in-law and her friends who were visiting.  So it's very versatile, and very easy!  Because of the red wine, it can take on a little bit of a pink hue.


Slow-Cooker Red Wine and Mushroom Risotto

  • 1/4 yellow onion, chopped
  • 1 clove garlic, crushed
  • 3 Tbs butter
  • 1 to 1.5 cups Arborio rice
  • 1-2 containers baby portobello mushrooms, quartered
  • 1/2 cup full-bodied red wine
  • 2 1/2 cups chicken broth (we use low-sodium organic)
  • Parmesan cheese to taste
  • Salt to taste

In a medium to large saute pan, melt 2 Tbs butter.  Add onion, garlic and mushrooms and cook until soft (about 2-3 minutes).  Now you could get pre-sliced mushrooms, but I recommend getting the mini ones whole, and then quartering them (or halving the smaller ones) because I think it preserves more flavor that way.  Once the onion, garlic, and mushrooms are soft, add the Arborio rice and stir for 1-2 minutes--just coating the grains.  You may add more butter at this time to make sure all the grains are coated.


I have flexible amounts of rice and mushrooms listed because if you're making as a main dish for a few people, you'll want closer to 1.5 to 2 cups of rice, and 2 containers of mushrooms.  Or if you just want leftovers.  If a side dish, or just a one-time meal for two people, stick to 1 c rice and 1 container mushrooms.  If making a larger batch, I'd add in some more wine--closer to 1 cup--just for good measure :-)

PAM your slow-cooker, and then scrape the mixture into it once all the grains are coated.  Add in the broth and wine (and optional salt if you want it), and mix thoroughly in the slow-cooker.  Then cover, and cook on HIGH for 2 hours, or until all the liquid is absorbed, but the rice is still moist.  If the rice has dried out a little too much, stir in some melted butter (another Tbs or 2).  Sprinkle with Parmesan and serve immediately.  It reheats really well too!  And when I made for a gathering, I made it ahead of time and then kept warm by moving to my serving dish and keeping on a low temperature in my oven while guests arrived.

You could also consider topping with shaved or grated Asiago--but Bobby and I both prefer Parmesan.


Sunday, June 17, 2012

Chicken and Pasta Caesar Salad

I think it's entirely possible that Bobby married me for access to my mother's Caesar salad recipe.  And key lime pie.  But more on pie later.


This recipe is a slight derivation from her original Caesar recipe, in that I've added ingredients to make this version a 'meal salad' instead of a 'side salad'.  It's basically something I made up to combine her delicious salad with one of my favorite dishes at Amerigo's (is Amerigo's still around even?  We had one in Louisville for a while but it closed!  That would be a shame because Amerigo's was delicious!)

And don't worry, there's no anchovies.


Chicken and Pasta Caesar Salad

  • 1-2 cloves garlic, crushed
  • 1/2 c (ish...) of EVOO
  • Several handfuls of romaine lettuce or enough to fill the bowl (or spinach...we use spinach for pretty much everything)
  • 1 egg yolk
  • 1/4 c lemon juice
  • 1 handful shredded parmesan cheese
  • 1 package chicken tenders, grilled and chopped
  • 1 1/2 c shell pasta, cooked
  • 2-3 Tbs of jarred pesto OR another 2-3 Tbs of EVO and a few dashes of dried basil flakes
  • Salt and pepper to taste
  • Croutons if desired


I'll start out by apologizing for the lack of exact ingredients!  I think I've just made my mom's Caesear salad so often I completely eyeball everything.


In a large salad bowl, add crushed garlic to the bottom.  Pour EVOO on top of the garlic--enough so that it coats most, if not all, of the bottom of your salad bowl.  And a few sprinkles of salt (we use no-salt seasoning) and pepper.  Let that sit while you grill the chicken tenders and boil the pasta.  We use a George Forman grill for chicken tenders usually, but you could also chop and cook in a skillet with a little EVOO if you don't have a Forman grill.  Or bake them if you have more time...but who has that?


When the pasta is done, drain it and let it cool in the colander for a little while.  Same with the chicken--let it cool for a while before chopping.  


Add lettuce or spinach to the salad bowl.  Top with parmesan and croutons.  Then add chopped chicken.  Once the pasta has cooled a little bit, move it to a small mixing bowl and combine with jarred pesto.  If you don't have pesto, you can add a few Tbs of EVOO and some dried basil flakes and it turns out great.  Basically you just want to get a little something on the pasta so it isn't dried out when you add it to the salad.  Add pasta to the bowl.


Place egg yolk in a small bowl and discard the shell and egg white.  Add 1/4 (ish...) cup of lemon juice (I typically go with fresh squeezed if you've got some lemons around) and whisk together quickly with yolk.  My mom calls this process 'coddling' I think.  She has assured me through the years that combining the yolk with lemon juice somehow, sort of...cooks it.  I've been eating her Caesar salad my whole life, so I'll get on board and assure you it's totally fine!  And really, it's not like we don't all eat cookie dough ya know?  All the same...my pregnant friends should probably not make this dish :-)


Once the egg and lemon juice are well whisked, pour on top of salad.  Mix thoroughly and serve immediately.  It's insanely good.


Sunday, May 20, 2012

Mom's French Breakfast Muffins


Just look at that deliciousness.  These were always a favorite of mine growing up because really, who doesn't love baked goods dipped in melted butter and rolled in a cinnamon/sugar mix?!  It's 10pm and my mouth waters just thinking about them.

I think the best part of these breakfast muffins is that they really don't take very long to make, and don't require a ton of ingredients.  One Saturday morning that Bobby had the day off, I woke up to take out Gus and left him sleeping.  I started thinking about something yummy I could make us for breakfast since he has Saturday mornings off so rarely.  Pair them with a delicious cup of coffee and YUM.  Talk about a great start to the weekend.

Mom's French Breakfast Muffins


  • 1.5 cup and 2 Tbs flour
  • 2 tsp baking powder
  • 1/4 tsp nutmeg
  • 3/4 cup sugar
  • 1/3 cup melted butter
  • 1/2 cup milk
  • 1 egg, beaten
Cinnamon/Sugar Mix

  • 1/2 cup sugar
  • 2 Tbs brown sugar
  • 2 tsp cinnamon
  • 1/2 tsp vanilla
Pre-heat the oven to 400.  Combine flour, baking powder, nutmeg and sugar in a large mixing bowl.  In a smaller bowl, combine the melted butter, milk and egg.  Mix the wet ingredients into the dry ingredients thoroughly.  Grease and flour a muffin pan (don't skip this! I made that mistake the first few times I tried to make these!).  Fill them each about half full.  Bake about 20 minutes, and then remove them from the muffin pan right away.

Some of the muffins may have a little excess flour on the bottom--use a butter knife and scrape this off very carefully.  I've learned through trial and error that because you're going to dunk them in melted butter, if there's extra flour on the bottom it absorbs all the butter quickly and makes the bottoms mushy.

Melt about a half cup of butter (more if you need it).  Mix the sugar, brown sugar and vanilla into a small bowl (but one that is large enough to roll the muffin in).  You may want to use a small whisk to make sure the vanilla doesn't clump the sugar.  Then one by one, dunk the muffins into the melted butter (I usually use a small saucepan and keep it on the burner set to Low).  I recommend using a slotted spoon to remove the muffin so it drips off excess butter before rolling it in the sugar/cinnamon mixture.  Serve immediately!

Saturday, May 12, 2012

Spicy black bean and turkey burritos

When making a 'come-back' it's probably wise to post interesting or at least aesthetically pleasing recipes. Now I wouldn't say this was necessarily UN-intersting, but I'll admit the photo may not be the best representation of the following yumminess  (But isn't that always the way with Mexican food?  Think about it--it's the only genre of food that can get away looking like it does, and taste soooo good).  So while I could have gone with a more interesting or unusual-sounding recipe, or something that had a really pretty photo--I figured the focus of the blog is intended to be quick meals that are reasonably healthy--and that's exactly what this dinner is!

It's no secret Bobby and I love our Mexican food, and when we're really wanting something tasty and spicy, but not too heavy--this is our go-to recipe.  The recipe below I'm going to call a 'base'.  Because it is originally taken from Kraft Food's Layered Enchilada Bake, and after I made that recipe a few times, I discovered it would be a great 'base' for burritos or even taco salad.  Of course the original recipe calls for beef I think.  And obviously it's delicious with beef.  But swapping for ground turkey is really easy in this recipe in particular because it's so flavorful that you don't need beef.

I decided against a picture of the 'final product' because really, all burritos kind of look alike...and instead here's a photo of the 'base' in the skillet.


Spicy Black Bean and Turkey Burritos


  • lb ground turkey breast
  • 1/2-1 onion, chopped
  • 2 cups salsa (I have started using this recipe from Pioneer Woman to make my own)
  • 1 can low sodium black beans, rinsed
  • 1/4 c Italian dressing (recipe obviously calls for Kraft, I use Wishbone Light)
  • 1/2 package low sodium taco seasoning
  • 1 cup reduced fat sour cream
  • Top with shredded cheese and lettuce


Spray a large skillet with Pam, and add crumbled ground turkey and chopped onion.  Cook, stirring frequently until turkey is thoroughly cooked and onion is soft.  Add salsa, black beans, Italian dressing, and taco seasoning.  Stir until well mixed and bring to a boil.  Reduce heat and let simmer for 30 minutes on the stove.  Add in sour cream to base to tone-down the spice in the mixture, or you can add sour cream to the burritos as a topping--your call!  Scoop into warm tortillas and add toppings.  It usually makes enough for leftovers too!


Tuesday, May 8, 2012

Mexican Chocolate Pound Cake

The blog is back!


It's been well over a year since my last post--and I can pin-point the exact day my blog hiatus began:  March 17, 2011.  Match Day.  We were thrilled to have matched in Orlando, FL, and we've been so happy here!  But for a lot of reasons (mostly good ones!) I was busy in a way that I'd never been busy before, and blogging had to take a back seat to packing up and moving 1,000 miles away, buying our first home, making that home 'feel like home', making new friends, spending time with family, lots of travel, adjusting to Bobby's residency schedule, and that small piece of my day that makes these things possible:  working!  Looking back, I think I couldn't sit down to blog because I just had too much to say, and I wasn't sure how to say it.  


But I never deleted my blog (well, I had to delete the other one, per Bobby's request), and didn't consider my blog hiatus to be 'quitting' the blogosphere--I knew I'd be back when things calmed down a bit!  And they have :-)  We continue to be very happy here, and we've settled into a good routine.  I will occasionally share bits of residency and life info on this blog, but for readers solely interested in recipes, you can always scroll down!  Bobby's enjoying his General Surgery residency, and really likes the other surgeons and the hospital as a whole.  Yes, his hours are insane.  Imagine the worst possible hours your spouse could keep...and then make it slightly more worse than you imagine.  Interns aren't supposed to work more than an average of 80 hours a week (so on average, imagine your spouse working an additional 40 hours a week).  That's two full-time jobs for one person.  Next year the hours restrictions are lifted, so I'm bracing for that!


On to Kitchen things!  My kitchen is adorable, with yellow walls and blue accents.  A fantastic countertop and cupboards, with lots of space.  I'll add some photos soon.  So with a new kitchen, I gave the blog a new blue look.


I figured I'd make a come-back with something sweet and yummy--a Mexican Chocolate Pound Cake!  The other night it was late (you know...after 8:30pm) and I wasn't necessarily craving dessert, but I had some energy, and  I just felt the urge to bake something.  So I poured a glass of wine, grabbed an apron, turned on the Adele Pandora station, and pulled out this recipe I had dog-eared in my 2010 Southern Living Annual Recipe Book.


Mexican Chocolate Pound Cake


8oz package semisweet chocolate baking squares, chopped
1c butter, softened
1 1/2 c sugar
4 eggs
1/2 c chocolate syrup (I used Hershey's No Sugar Added)
2 tsp vanilla extract
2 1/2 c flour
2 tsp cinnamon (I probably used closer to 2 Tbs because I like cinnamon)
1/4 tsp baking soda
1 c buttermilk
1 c chocolate chips (not in the original recipe, but I think they'll make a great addition!)
1/2 c powdered sugar


Microwave the chocolate baking squares in a microwave-safe bowl for 1-2 minutes, or until melted--stir every 15-30 seconds.


Using a mixer, beat the butter until creamy, and then gradually add in the sugar--beat at least 5 minutes or until fluffy.  Add the eggs one at a time, beating just until the yellow disappears after each addition.  Stir in the melted chocolate. syrup, and vanilla until smooth.


In another bowl, combine the flour, cinnamon and baking soda.  Then add to the batter alternately with the buttermilk (begin and end with the flour mix).  Fold in chocolate chips.  Pour batter into a greased and floured bundt or tube pan.  Bake at 325 for an hour.  Let it cool on a wire rack for 15 minutes, and then remove from the pan and let it cool alone on the rack for an hour and a half.  Garnish with sifted powdered sugar.

Sunday, March 6, 2011

Chocolate Peanut Butter Trifle

"A layer of beef, sauteed with peas and onions..."


Just a little Friends humor :) The great thing about trifles is that they look fabulous but are not difficult at all. AND they give you a great reason to actually use the trifle bowl you registered for way back when! I think there are some fancier versions of trifles, but this one comes together very quickly, and come on, who doesn't love a chocolate-PB combo? Plus if you might have some children in the crowd, I'd dare to guess that most kids will eat this! Thank you Kraftfoods.com for sending this to my inbox!

I actually had to leave out a layer of Cool Whip in mine because I ran out, so I'm posting a recommended change for 2 tubs of Cool Whip instead of just one.


Chocolate-Peanut Butter Trifle

1 pkg. (3.9 oz.) Jello-O Chocolate Instant Pudding
1 pkg. (3.4 oz.) Jell-O Vanilla Flavor Instant Pudding
3 cups cold milk, divided
1/4 cup creamy peanut butter
2 tubs (8 oz.) Cool Whip, thawed, divided (we used sugar-free)
1 bag Chips Ahoy! Cookies, chopped (we just used the regular, but they make all kinds you could try--including some with PB cups or toffee hunks in them)
3 Tbsp. chocolate syrup

Empty pudding mixes into separate medium bowls. Add 1-1/2 cups milk to each; beat with whisk 2 min. Add peanut butter to vanilla pudding; beat until well blended. Stir 1/2 cup COOL WHIP into pudding in each bowl.

Spoon chocolate pudding mixture into trifle bowl; cover with layers of half each of the remaining Cool Whip and chopped cookies. Repeat layers, using vanilla pudding mixture.

Drizzle with chocolate syrup.


Again, I didn't feel like I had enough Cool Whip left over in my one container to make two decent layers with it--so I'd recommend just eyeballing it and doing what you think is best. Even with just one layer of Cool Whip it was delicious!

Sunday, February 27, 2011

Hoppin' John Stew with White Cheddar Cheese Grits

So I had never before heard of Hoppin' John Stew, even though it completely sounds like something I would have at least tried before. But it caught my eye around the holidays as I was flipping through my Southern Living Recipes of 2010 cookbook, and everything in it sounded perfect! We've actually had this twice since the beginning of the year because it made enough to freeze leftovers--and both times Bobby all but licked the bowl clean! And so did I, who am I kidding?

I thought it would be timely to post this because I've found myself struggling with recipes as we transition between the seasons and I thought others may feel that way too. The very cold Winter months are a good time for heavy casseroles, stews, chili, etc. but now that we're thawing out of our deep freeze and creeping ever-so-slowly into Spring temperatures, I find myself wishing for tilapia and summer salads--but we're not quite there yet! So it's difficult to find the happy medium. But I do think this recipe is a good one for the end of Winter because although it's a stew and definitely feels like comfort food, it's not TOO heavy and has just enough of a kick to it!

I'll also say this was my first time making grits...and I didn't do very well! I'm not a grits expert by any means, so it was hard for me to gauge when they were fully cooked, and I made them a little underdone the first time around. The second time I called in Bobby and his South Carolinian heritage to offer grits-cooking wisdom. He had a way of knowing just by the resistance he had stirring them at certain intervals how done they were...and they weren't ready until MUCH after I would have taken them off. So if you are new to grits, I advise you keep them on the stove for a while after you think they're done, just to be sure. We also adjusted the recipe some to be low-sodium friendly, and it was all still delicious.


Hoppin' John Stew


1 Tbs butter
1 cup chopped smoked ham (I picked up sliced low-sodium ham from our deli)
1 medium onion, chopped
2 (15-oz.) cans black-eyed peas, drained and rinsed
2 (10-oz.) cans diced tomatoes with green chiles, undrained (I opted for two cans of No Salt Added tomatoes and added a 10oz can of green chiles separately)
1 cup frozen corn kernels
1 teaspoon sugar
1/4 cup chopped fresh cilantro (couldn't find any, dried cilantro worked fine, but just do a few shakes of it)

Melt butter in a Dutch oven over medium heat; add ham and onion, and sauté 3 to 5 minutes or until onion is tender. Stir in black-eyed peas, tomatoes, green chiles, corn and sugar. Cover, reduce heat to low, and cook, stirring occasionally, 15 minutes. Remove from heat, and stir in cilantro. Serve immediately over White Cheddar Cheese Grits.

White Cheddar Cheese Grits

2 cups chicken broth (the first time I did one cup broth and 1 cup water; the second time all water and couldn't tell a difference)
2 tablespoons butter
1/2 cup uncooked quick-cooking grits
1 cup (4 oz.) shredded white cheddar cheese

Bring chicken broth and butter to a boil in a medium saucepan over medium-high heat. Gradually whisk in grits, and return to a boil. Reduce heat to medium-low, and simmer, stirring occasionally, 5 minutes or until thickened. Stir in cheese until melted. Serve immediately.

Thursday, February 10, 2011

Superfood Salad

I'm obsessed with this salad. Obsessed. It's like someone (or my AllRecipes.com Dinner Spinner app) took all of my favorite things and put them in a salad. This recipe is clearly intended to feed 4 people, and Bobby and I shamelessly ate the whole thing. But when you're eating something that is so packed with superfoods, and they're so YUMMY, that it's just impossible to stop! It was pretty quick for a Tuesday night, too.

Basically, we've had lots of good dinners this week, but nothing will top this salad in my mind.


Superfood Salad

2 salmon fillets, grilled
2 Tbs butter
pepper to taste
4 ounces fresh mushrooms, sliced (I just used the whole container)
12 grape tomatoes, halved
2 tablespoons olive oil, divided
a few handfuls of spinach, washed and dried, enough to make a salad (original recipe actually calls for leaf lettuce, but spinach is so much better for you)
1 avocado - peeled, pitted, and cubed
5 sprigs fresh cilantro, chopped
1 fresh jalapeno pepper, chopped
2 tablespoons distilled white vinegar (we were out so I used some Champagne dressing)
1 ounce feta cheese, crumbled (I used what was left in our container, probably more like 3 oz)

While grilling salmon (or use leftovers), saute mushrooms in butter over medium heat until tender. In a large salad bowl add Spinach, salmon, tomatoes, mushrooms, avocado, cilantro, jalepeno, and feta. Sprinkle generously with pepper. Toss with olive oil and white vinegar (or other type of vinaigrette you've got on hand) and serve immediately.

Really, there are so many things going on in this salad, that I can understand the doubt about them combining well. But they combine like heaven in my salad bowl and I'm mad at myself because I've had this recipe for over a year and never tried it until this week! But the important thing is I have it now :-)

We finished the evening with homemade chocolate chip cookies (see January 2010 for recipe).

Sunday, January 30, 2011

Beef Bourguignon and Sugar-free Pudding Pie

B: So it's beef stew.
A: No, it's
Beef Bourguignon.
B. So...it's like beef stew?
A: It's different.
B: It looks like beef stew.

OK fine it's basically beef stew that took me about 3 hours longer than a normal beef stew would have done! This was an experiment out of the American Heart Association's Cookbook, and it turned out well. It doesn't look as pretty as what Julie Powell made in
Julie and Julia. But I haven't actually read the Julia Child recipe to see how it varies. But they made it look so yummy in that movie that I had to try it when I saw a recipe for it! And it was good. However, it did take a little while to make...so I would definitely recommend making this on a lazy Saturday or Sunday. It was great Winter comfort food (I think comfort food is the only good thing about Winter, don't you?) It also made delicious leftovers! I'm a little bit of a leftovers snob, but I happily ate leftovers of this the next two days! And sometimes with a soup or stew, it gets a little better as it "settles" and all the flavors mingle together a little longer. Which is why they recommend the long cooking time in the first place! I currently am doing the same thing right now with my spaghetti sauce...must cook a minimum of two hours to get just right.


Beef Bourguignon

2 Tbs flour
pepper to taste
1lb lead beef chuck roast, all visible fat removed, cut into 1 inch cubes
1tsp vegetable oil
1/4 cup chopped onion
1 med clove garlic, minced
2 cups small whole mushrooms (we used baby portobellos...YUM!)
2 cups finely chopped tomatoes (4 medium) or 14.5oz no salt added diced tomatoes
1 1/2 cups water, plus more as needed
1/2 cup dry red wine
1/4 tsp thyme
1/4 tsp dried basil
1/4 tsp oregano
1/8 tsp rosemary
1/8 tsp marjoram
3 cups peeled, coarsley diced potatoes (4 medium)
2 cups coarsly diced carrots (4 medium)

In a large bowl, stir together flour and pepper. Add beef, turning to coat. Heat a Dutch oven over med-high heat. Remove from heat and spray with vegetable oil spray. Add oil, coating the bottom. When oil is hot, cook beef for 1 to 2 minutes, stirring frequently. Stir in mushrooms and cook for 1 to 2 minutes, or until mushrooms absorb liquid. Stir in tomatoes, water, wine, and herb seasoning. Reduce heat and simmer, covered for 2 hours, stirring occasionally and adding water if necessary to keep bottom of pot covered. Add potatoes and carrots; simmer, covered, for 30 minutes, or until tender.

I actually just used three potatoes and I think it turned out just fine! You can also do a slow-cooker version. Where you coat the meat in flour, and then just add everything to your slow cooker pot for 8-9 hours on Low.

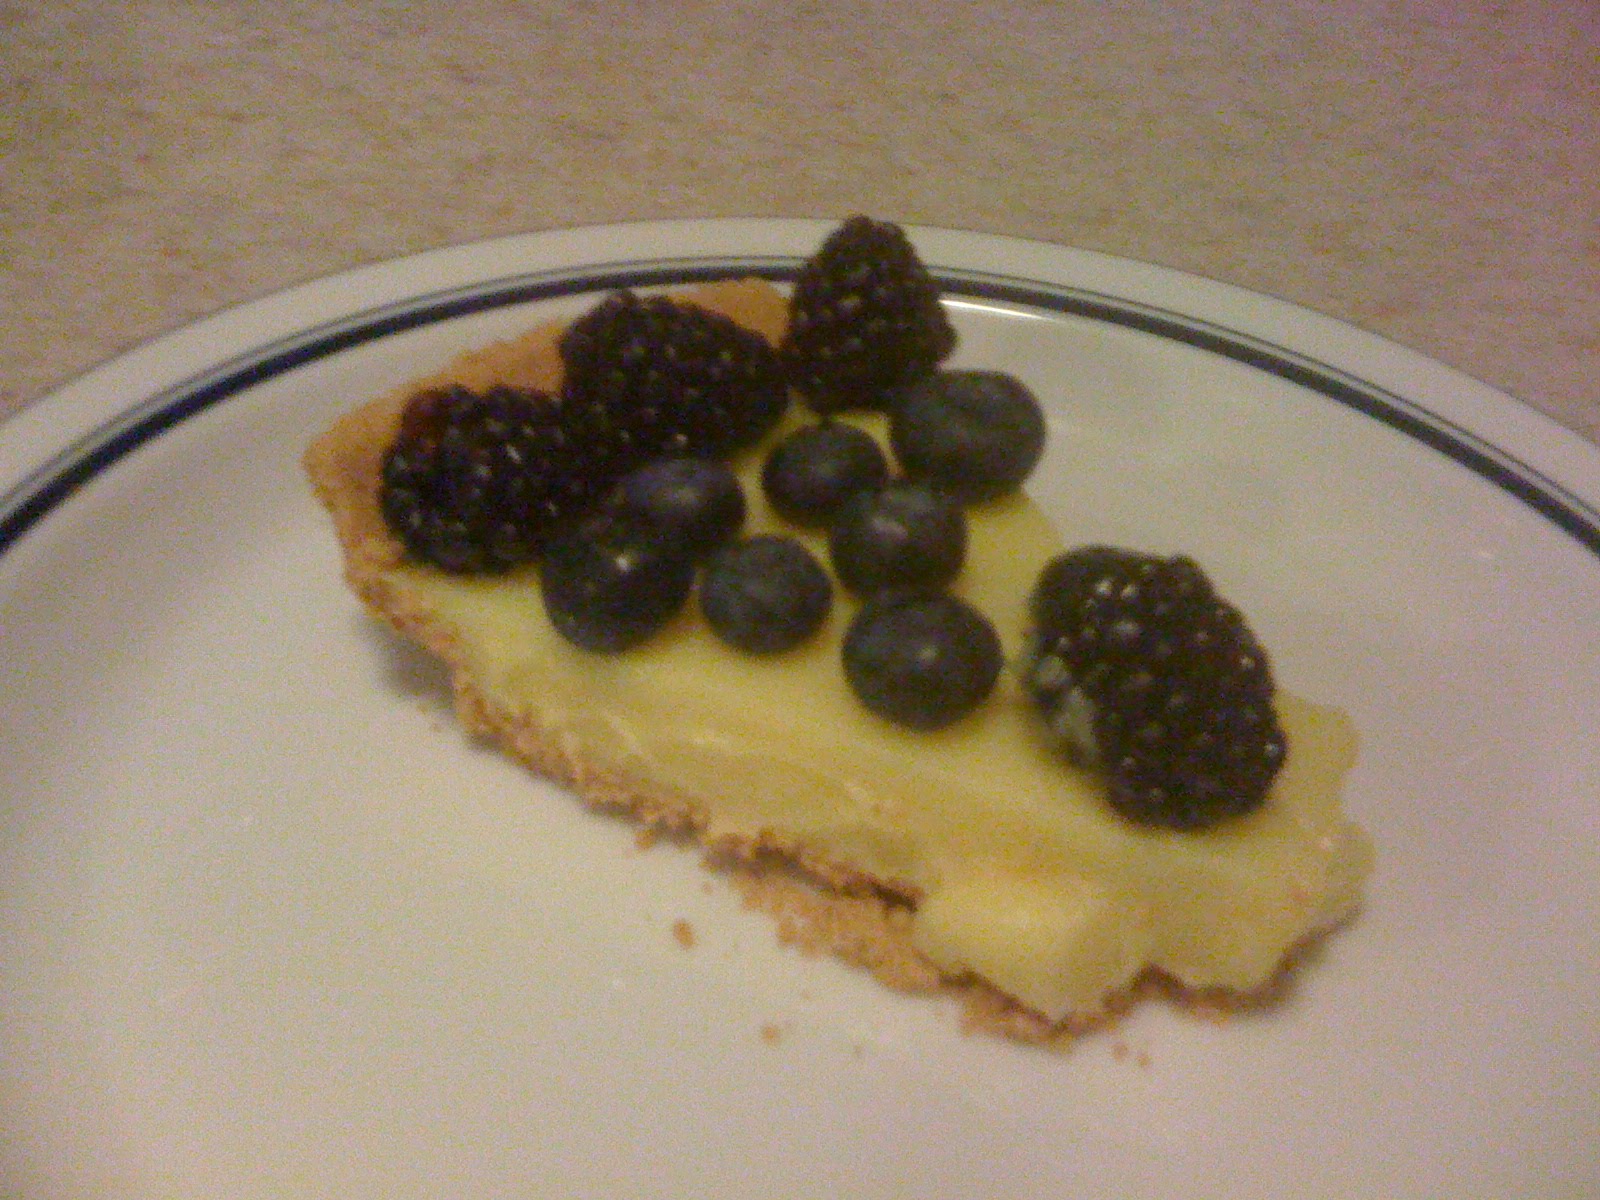
For dessert I made a Sugar-Free Pudding Pie. This looks very fancy, but honestly it wasn't! Bobby had seen these berries in Costco, and insisted on having them...even though January isn't exactly known for it's delicious berries, ya know? However, I was pleasantly surprised with how good they were. So I had a pie crust on hand and some sugar-free pudding and had the idea to mix them all together! Easy, EASY dessert that looks put-together and takes no time at all! And you won't feel too guilty about indulging.


Sugar-Free Pudding Pie

1 reduced fat graham cracker pie crust
1 package sugar-free instant vanilla pudding
1 3/4 cup milk
1 cup blackberries
1 cup blueberries

Instant pudding actually has special directions for making a thicker batch of pudding for pies, and it calls for less milk. I think normally it calls for 2 cups. So make the pudding according to directions and pour directly into pie crust when mixed. Let chill in the fridge for 1-2 hours before topping with berries.

Of course, you can trade out your favorite pudding flavor and toppings. But if you're like me and a little intimidated by baking, this is a great alternative!

Sunday, January 23, 2011

Pepper Jelly Pork Chops and Citrus Spinach Salad

OK I'm back for real this time! I was so excited that Bobby moved home in November from his two months away, that I didn't really take into account that he still wasn't going to be here with any regularity because of all his travel for interviews. Which are FINALLY over! I can't tell you the extent to which, last Sunday evening I wrote down a full week of menus on my whiteboard and nearly cried tears of joy! I'm so happy to have Bobby back home with no planned impending travel, and a regular work schedule (Family Med til mid-Feb).

We have several health related goals for 2011, and in particular we're working to lower Bobby's cholesterol and reduce his sodium intake. So you may see some changes in the blog as a result. Also, in recent months, I've started eating more chicken! I make no promises that I'll be making chicken regularly...but I hope to have chicken in the menu plan at least once a week. This week we're having it in sweet and sour stir fry...as soon as I find a recipe for low-sodium sweet and sour sauce.

So the following is what I consider to be my first official new recipe of 2011. Both can be credited to my new
Southern Living 2010 Annual Recipes cookbook that I got for Christmas. We really liked this pairing--spicy with citrus--and definitely plan to make it again...maybe with chicken!


Pepper Jelly Pork Chops

4 (3/4-inch-thick) bone-in pork loin chops (about 2 1/4 lb.) (We actually just made two)
3 tablespoons butter, divided
3 tablespoons olive oil
1 tablespoon all-purpose flour
1 large jalapeño pepper, seeded and minced
1/3 cup dry white wine
1 cup chicken broth
1/2 cup red pepper jelly

Melt butter with oil in a large skillet over medium-high heat. Add pork chops and cook on one side until they look about half way cooked, then flip and do the other side. The timing on this will vary based on the size of your pork chop, since some are ridiculously thick. When finished, remove from skillet, and keep warm.

Add flour and jalapeño to skillet. Cook, stirring constantly, 1 to 2 minutes or until flour is golden brown. Add wine, stirring to loosen particles from bottom of skillet; cook 1 minute or until almost completely reduced. Add chicken broth, and cook 2 to 3 minutes or until mixture begins to thicken. Whisk in pepper jelly until melted and smooth. Lower the heat and cook 3 to 4 minutes or until thickened. Return pork to skillet; turn to coat. Serve pork with sauce.

It's spicy, but YUM! Then paired with a citrus salad (so great this time of year with all the fresh citrus). I made this salad dressing, and tossed with spinach leaves, toasted almonds, and chunks of a cara-cara navel orange (the pink ones). But you could do a regular orange or a grapefruit.


To toast your almonds, just add half a package of almond slivers to a small skillet and stir on med-low heat until a few begin to turn a golden color.

Citrus Vinaigrette

1 (1/2-inch) piece fresh ginger, peeled
2 tablespoons red wine vinegar
1 tablespoon chopped sweet onion
1 tablespoon honey
1 teaspoon orange zest
1/4 teaspoon dry mustard
1/4 cup olive oil

Pulse first 6 ingredients in a blender or food processor until blended. With blender running, add olive oil in a slow, steady stream, processing until smooth.

My little food processor won't run unless the lid is on, so I added the EVOO after the first 6 ingredients were well blended, and it worked out fine! Serve with warm bread (my favorite these days is the Rosemary Olive Oil bread from Costco, and I make a little saucer of good olive oil with some dried basil flecks and Italian seasoning.)

Wednesday, November 24, 2010

Spiced Apple Coffee Cake / What I'm Loving Wednesday

I'm back! And just in time for the holidays! Actually, I'm just doing a mini-Thanksgiving this year since it'll just be me and Bobby, so no new Thanksgiving Super-Post for you. But I am coming back with a bang, regardless, because today I'm sharing a recipe for the best (and I do mean BEST) spiced-apple coffee cake you will ever taste. But as part of that, I'm going to steal a little blog-thing from my friend, Beth Ann, and do a What I'm Loving Wednesday post because I think they're such a cute idea. And a good way to re-ignite the blog! So here we go.

What I'm Loving


1) Bobby's home! He's been gone for two months doing away rotations in South Carolina and Florida and now he is back home, in the cold, with ME! And Gus and Shadow. No, it did not go quickly, and do not suggest anything otherwise to me. I really did try to cook in his absence...for about a week. And then I gave up and spent the following 7 weeks eating stir-fried veggies, Healthy Pop and apples, cheese and crackers, carrots and celery with hummus, etc. I'm going to have to be very careful not to balloon now that he's back and I'm cooking again. It's Thanksgiving week so I'll be a little lenient on my diet this week, but next week--back to it!


2) These two, for obvious reasons.


3) Baby Lily is going to be born today! Bobby's sweet cousin Katie, and her husband Noah, are at the hospital and in labor right now. They will be the most amazing parents and cannot wait to meet the new addition to the family! The question remains...will she be blonde? or a redhead?

4) Apples. I love fall because I get the best apples. I'm *kind of* an apple snob, and I'm extremely picky...but I can't help it! I'm from Washington! What do you expect? But I love going to Kroger or Whole Foods these days (mostly Kroger, the budget is super-tight right now) and stocking up for the week on Braeburns, Granny Smiths, Fujis, Cameos...the list goes on. I want them cold and crisp. Don't give me a mushy apple. If you do, I'll just feed it to Bobby.

5) Pandora. Obviously not a new thing, but I've got it on almost all the time now. It's great with headphones for work when people are clipping their nails over the cube wall. Dis.Gus.Ting.

6) My Mariah Carey All I Want For Christmas Is You ringtone! I don't think this requires explanation. And just the fact that we're entering the Christmas season...just love it! Christmas music, lights, scents, gingerbread! All of it!

7) And finally, the best (seriously best) Spiced Apple Coffee Cake in the world. I got this recipe from one of my cooking technique classes at Williams-Sonoma. So you know it's delicious! When I tried the sample in class, I nearly melted. And at the time, had no one to make it for! So I waited patiently and made it for Bobby on Monday evening so the whole apartment would smell like spiced apples when he came home, and that way he'd have yummy breakfast all week long. I can't stop "trimming the edges" as my dad would say. And do you know why? Because it has the best ingredient in the world. And I'm not talking about butter, Julie Powell. Although butter, real butter, is in there too. The best ingredient in the world, in my opinion, is: Cream Cheese. Have you ever had anything with cream cheese that you didn't swoon over? I didn't think so. It gives it the perfect texture. So I know we're on the tail end of Fall, but please make this ASAP! You won't regret it.

Williams-Sonoma Spiced Apple Coffee Cake

For the cake:

1 3/4 cups all-purpose flour
1 1/2 tsp. baking powder
1/4 tsp. salt
3 tart cooking apples, such as Granny Smith or Braeburn, 1 lb. total, peeled, cored and coarsely chopped (I used Granny Smiths...yum-o)
2 Tbs. strained fresh orange juice, lemon juice or apple juice (I used lemon, because that's what I had on hand)
1/3 cup firmly packed light brown sugar
1 1/2 tsp. ground cardamom
1 tsp. ground cinnamon
8 Tbs. (1 stick) unsalted butter, at room temperature
8 oz. cream cheese, at room temperature
1 1/2 cups granulated sugar
1 tsp. vanilla extract
2 eggs

For the vanilla glaze:

3/4 cup confectioners’ sugar, sifted
2 Tbs. condensed skim milk, warmed, plus more as needed
1/2 tsp. vanilla extract

Preheat your oven to 350°F. Grease and flour a 9-inch round cake pan or square baking pan. If using a glass baking dish, reduce the oven temperature to 325°F.In a bowl, stir together the flour, baking powder and salt. In another bowl, toss the apples with the juice. In a small bowl, stir together the brown sug ar, cardamom and cinnamon. Add to the apples and toss to coat. Set aside. In the bowl of an electric mixer fitted with the flat beater, combine the butter, cream cheese, granulated sugar and vanilla and beat on medium speed until light and fluffy. Add the eggs, one at a time, beating well after each addition. Add the flour mixture in 2 or 3 additions and beat well until smooth. Using a large rubber sp atula, gently fold in the apples just until evenly distributed, no more than a few strokes. Do not overmix. Spoon the batter into the prepared pan and spread evenly. Bake until the top is golden brown and a toothpick inserted into the center of the cake comes out clean, 60 to 70 minutes. Transfer the pan to a wire rack and let co ol for 5 minutes.

Meanwhile, make the glaze: In a small bowl, whisk together the confectioners sugar, the 2 Tbs. milk and the vanilla until smooth and pourable. Adjust the consistency of the glaze by adding more milk, a few drops at a time, if needed.

Flip the cake on a wire rack set to cool. While the cake is warm, drizzle with the glaze. Let the cake cool to room temperature. Cut into wedges or squares to serve.

Delicious! OK here's a photo of our cake (minus one piece...) and a photo from Williams-Sonoma. More recipes coming soon!